Here's how you can dynamically keep your GitHub profile updated!
Using GitHub Actions FTW!

Wanna give your GitHub profile a good landing page? Do you want your profile to dynamically update your readme profile with your new blog or content instead of manually updating them? Then you're at the right place. Today, I am gonna teach you how you can create a GitHub Readme file as per your taste and have it dynamically updated. (Hint: We are gonna use GitHub Actions, Don't worry if you don't know anything about it, JUST FOLLOW ALONG)
The Step-by-Step process
Getting Started
For any of this to work, you need to go to your Github and create a new repository! The new repository's name should be exactly the same as your GitHub Username.

Mine is already created so it's showing an error. Now, you've unlocked this special repository which will be on your GitHub profile.
Make sure you're enabling/checking the "Add a README file" option.
Also, ensure that the repository is public.
Now that you have your special repository created, let's customise it🥰
Using a GitHub Readme Template to get started
It is easy to use a template and customise it with our details and tailor it to our taste. This is why, I used this template here to initially generate my GitHub readme profile.
You can use the link given to generate your own GitHub readme and Generate it. Once you've generated it, click on the option that says "Copy markdown"
Now, Go to the Special repository and edit the readme file and Paste the markdown👇🏻
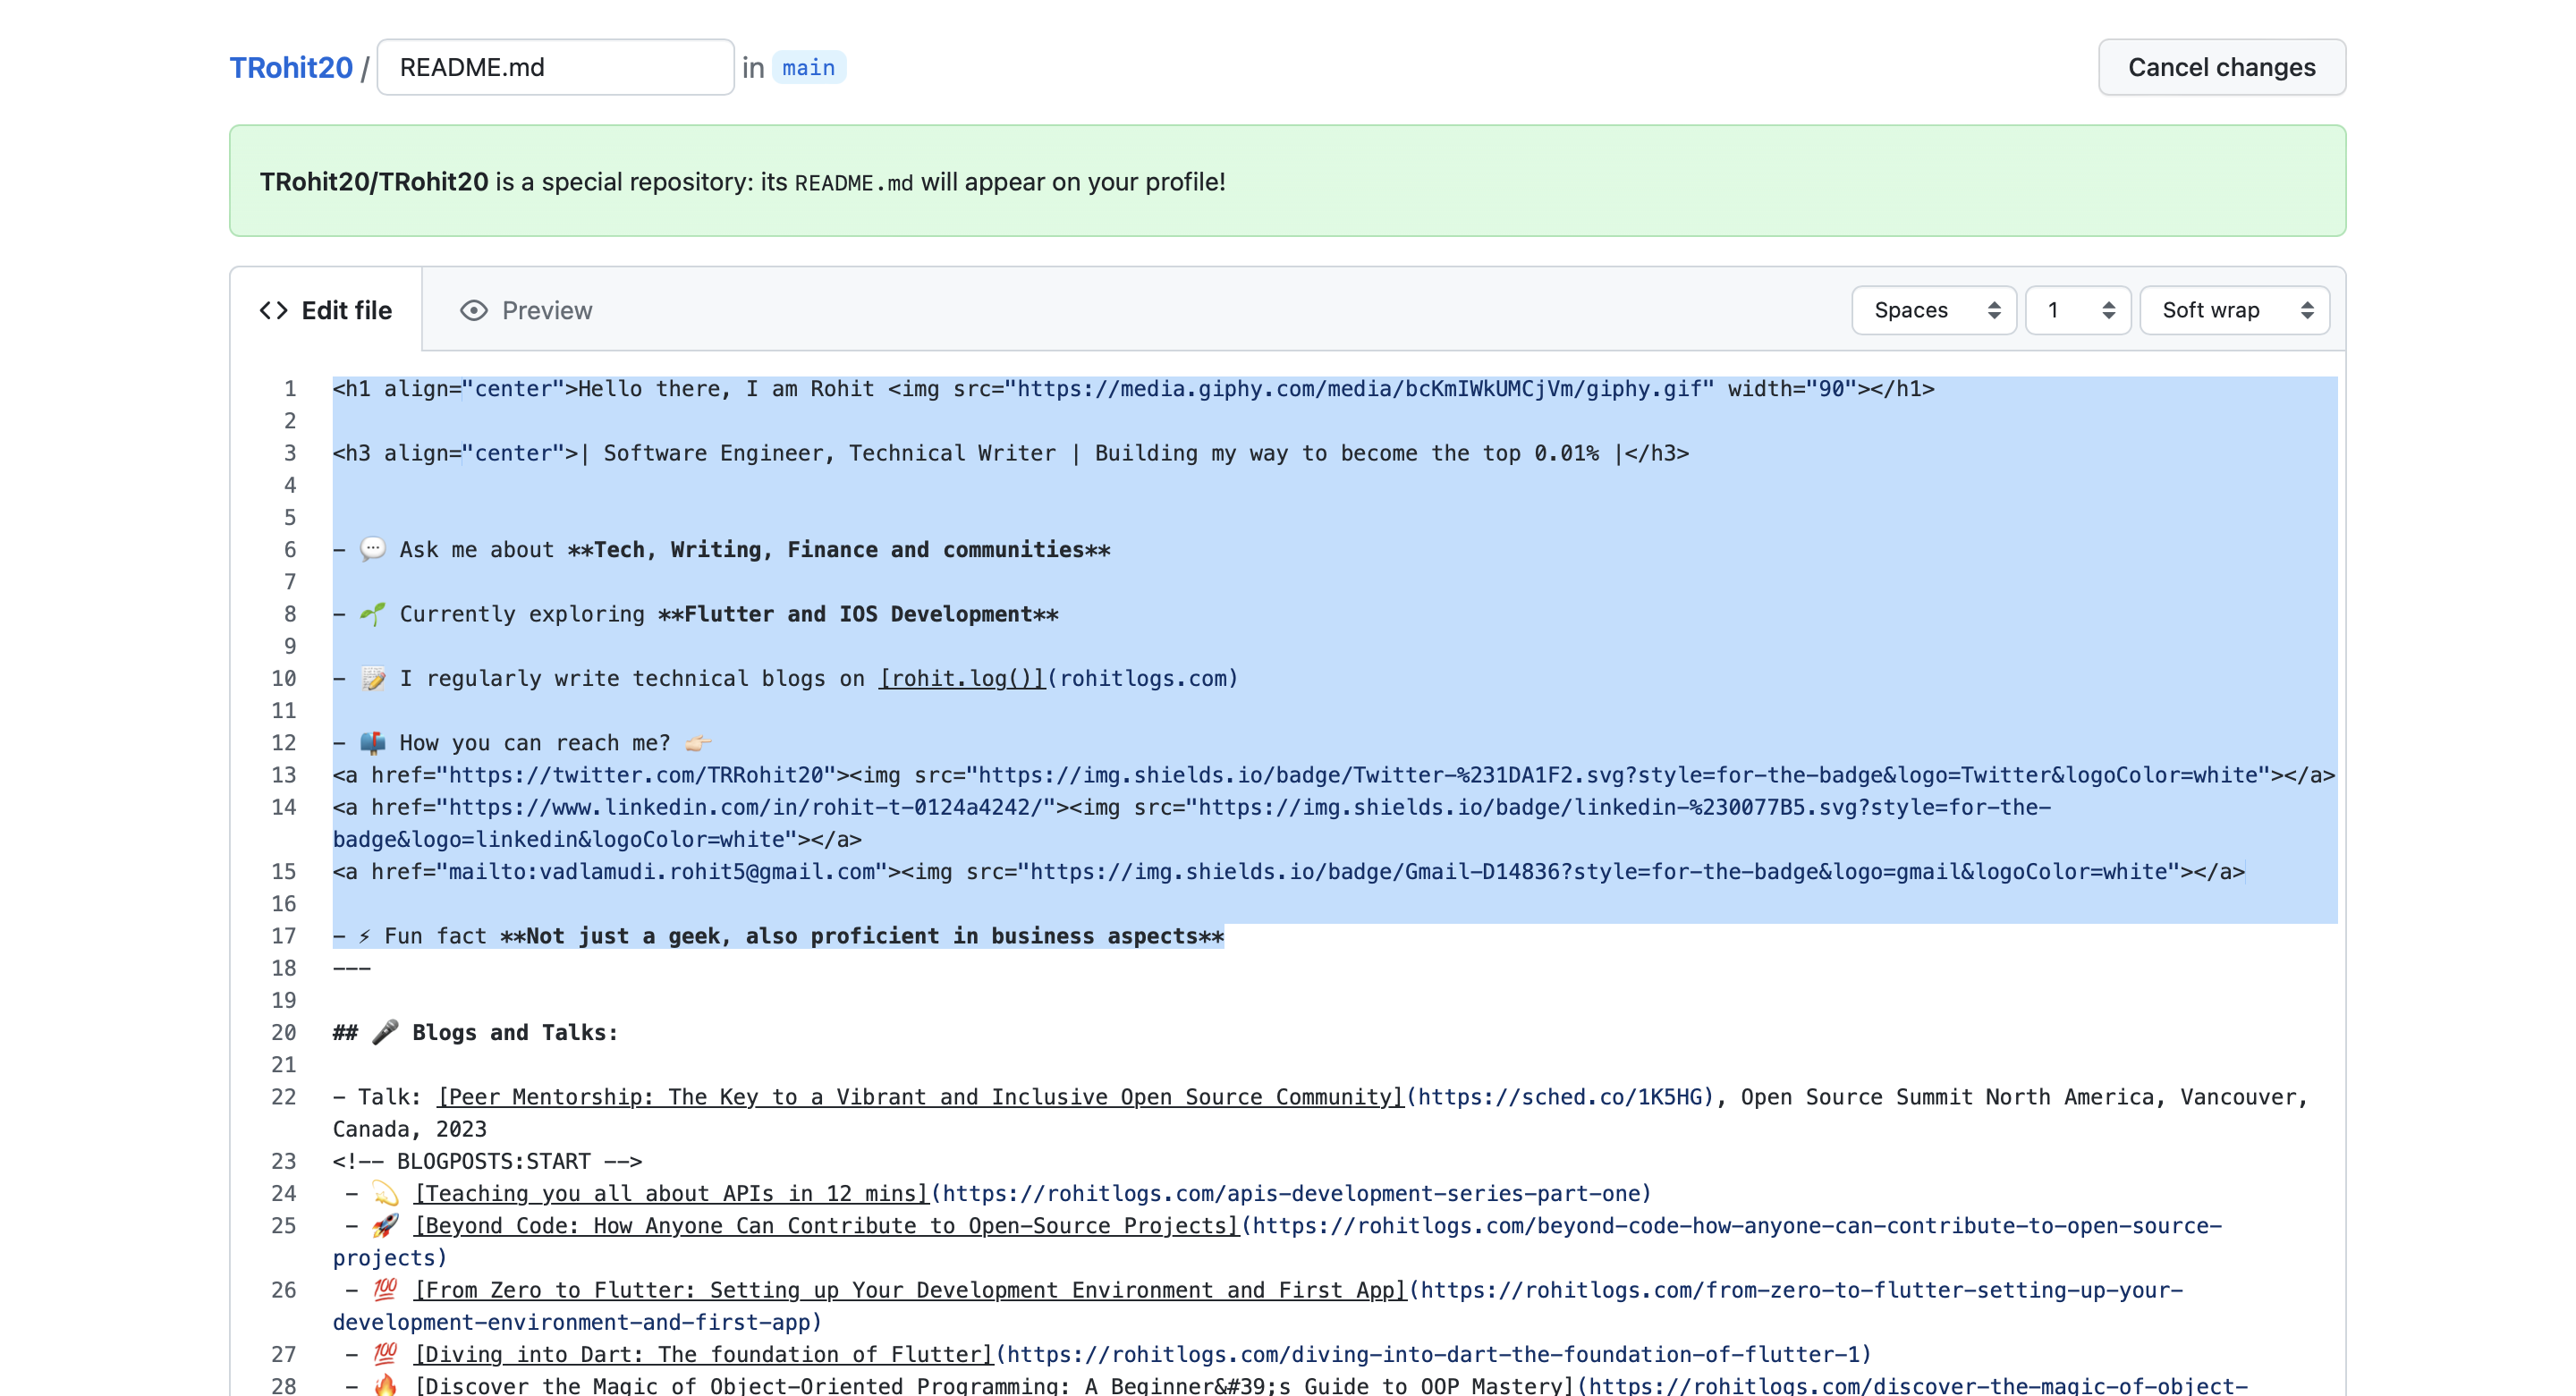
Et Voila, Now you have a GitHub profile page as per your taste. But, How do we set it up such that the repo dynamically updates the readme with our latest Blogs from hashnode? This is where GitHub Actions come into play! But before that:
Make sure that you insert the following snippet in the part of your .readme file where you wanna display your blogs
  #### :books: Recent Blog Posts
  <!-- BLOGPOSTS:START -->
  <!-- BLOGPOSTS:END -->
** This is important as this is how the application knows where to put the list that it fetches.
Using GitHub Actions to dynamically update the profile
You don't have to know anything about GitHub actions, Just follow along :)
Now, Go to the special repository we created in the first step. (
github.com/<your-username>/<your-username>)In the tabs you see under the repository, Click on the tab that says "Actions"

Now, you see an option called "Create a workflow". Click on it.

A new page with a blank .yml file created will appear. Now, you need to copy-paste the exact same workflow configuration as given below:
  name: Hashnode Blog Posts
  on:
    schedule:
      # Runs every 6 hours of the day
      - cron: '0 12 * * *'
    workflow_dispatch:

  jobs:
    update-readme-with-blog:
      name: Update this repo's README with the latest blog posts
      runs-on: ubuntu-latest
      steps:
        - uses: actions/checkout@v2
        - uses: gautamkrishnar/blog-post-workflow@master
          with:
            comment_tag_name: "BLOGPOSTS"
            feed_list: "<link-to-your-rss>"
            template: "$newline - $randomEmoji(💯,🔥,💫,🚀,🌮) [$title]($url)"
            commit_message: "recent posts section updated"
            gh_token: ${{ secrets.GITHUB_TOKEN }}
You are basically automating the workflow to run a test and fetch data for you every 24 hours (I chose it to be 24 hours, you can choose your own intervals, How? I will tell you that in just a moment)
Replace the
feed_listvalue with<your-domain>/rss.xml. In my case, It's like this:feed_list: "https://rohitlogs.com/rss.xml"If you are using hashnode, then your RSS feed link can be found at
<your-domain>/rss.xml.
Setting your own time interval
As I mentioned above, you can choose your own time interval for the workflow to run automatically and fetch your new blogs.
We can do that using the cron part.
The cron part is related to the running schedule of your action. Create an appropriate pattern so then your README.md file will be synced based on that schedule or time interval.
You can create your proper cron patterns easier with Crontab Guru. But Here are some of the cron patterns that should suffice for the most part:
Meaning | Pattern |
Every day at 12:00 AM |
|
Every 6 hours |
|
Every 1 hour |
|
Every 30 minutes |
|
Running the test manually for the 1st time
Save the workflow file(.yml) and open the "Actions" tab under the special repository again.
Under the "Actions" tab now, Click on the workflow you just created and Run the test manually for this once. To see if it's working as expected.
To do that, Click on the workflow on the left-hand side bar, Click on "Run Workflow" dropdown menu.
From the dropdown menu, Select "Run workflow" option
Wait for 15 to 30 seconds for the workflow to be successfully executed.
Once the workflow is run successfully, You can now check your GitHub profile and see your new blogs or content fetched automatically
And now you don't have to do this manually, The workflow will be executed by default as per your time interval and update the profile :)
Further customisation (OPTIONAL)
Since we're using a third-party action, you have a variety of configuration choices you can use for your workflow. Emojis can be used as bullet points in lists, and you can sort the list or list the last X items from the feed. All choices are available here.
Closing remarks
You can find my GitHub profile here for reference or inspiration. Have FUN!
That was it for today guys. I will see you very soon again. Until then,
Subscribe to my newsletter here, if you haven't already!
Like |Comment | Share | Follow Rohit T for more!
You can catch me on my socials here, and even let me know how this article helped you, and what would you like me to cover next!


